
Heroic Abbot has a reputation of being difficult to run, but with a little practice a handful of epic players can get fast and easy completions on elite. No special builds or gear required; all you need is a minimum of two players. Having three or more players speeds things up, but two works fine.
Note: Divine Crusader is preferred if it works at all for your build. This isn’t a requirement, though.
Table of Contents
Raid Mechanics
Tiles Puzzle
Ice Puzzle
Roids Puzzle
Strategies
2-Man Strategy
3-Man Strategy
4+ Strategy
Other Resources
Ascension Chamber on ddowiki
Abbot Tiles Fast and Safe Solution Method -- Crack Run by Vanshilar
DDO: Abbot One Round Solo, U27 by Rys
Compiled by Ellis and Sqrl of the Argonnessen Server
Results 1 to 20 of 20
-
12-21-2016, 10:08 PM #1
 Ascension Chamber - Shortman Guide
Last edited by EllisDee37; 12-21-2016 at 11:19 PM.
-
12-21-2016, 10:09 PM #2 Raid Mechanics
The basic idea is to beat down the Black Abbot (a lich) until he runs away, leaving three doors in his wake.
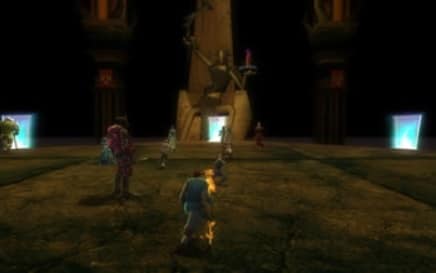
Each door goes to a random different puzzle: Ice, Roids, Tiles. He keeps running away and spawning doors until all three puzzles are complete, at which point he stops running away and you can kill him to complete the raid.
Each time the doors spawn is a "round." A one-round completion means the doors only spawn once. This short-man guide is designed to complete in two rounds, or three rounds if you only have two people.
The first time you fight the Abbot, he’s just a basic lich. (Immune to cold, DR/Bludgeon, etc…) After the doors have spawned, for each subsequent round he has four special super-attacks he spams frequently:
Inferno
You’ll see him burst into flames similar to Fire Shield, then around 9 seconds later the entire platform will be engulfed in flames. This fire drains both hp and sp every couple seconds. Drink 2 (two) curse potions to remove the effect. Due to the spell point drain, you may want to twist in Endless Faith from Exalted Angel so that you can keep casting with Echoes of Power. Also, you might want to bring Fire Shield scrolls to use when you see his tell.
Pro Tip: An upgraded Pale Lavender Ioun Stone absorbs the inferno effect completely: No damage, no curse, no mana drain. It costs ~10 charges per inferno. When his fire shield goes up I equip PLIS and run around to avoid extraneous spells that might further drain it. Inferno lasts for 3 ticks, 2 seconds per tick. Watch your PLIS and you'll see the three ticks drain 3-4 charges each. After the third tick, switch back to your regular trinket and resume fighting. The platform will still be engulfed in flames but it has no effect.
Encasement
He’ll start encasing people in rocks, which do heavy damage over time. The Divine Crusader ability Heavenly Presence grants immunity to encasement, which is a huge help. If you aren’t immune, jumping non-stop (for ranged and casters) is an effective defense, as you can’t be encased while in mid-air. Anyone who gets encased can be freed by other players throwing boulders from the Roids puzzle at them. A half dozen hits should free them.
Disjunction
All your equipped gear is suppressed for a couple minutes. Annoying, but largely ignored.
Ghosts
Trash mobs you can’t see spawn, draining your hp and sp. Largely ignored.
Entering The Raid
Gather on the first tile past the blue bridge for buffs and any final strategizing. Once anyone moves further in, the blue bridge disappears and nobody else can enter the raid proper. Like Shroud, late arrivals can get completions but no chests.

Puzzles
After the Abbot runs away each round, three doors appear going to the three puzzles. There are no enemies in any puzzle, and if you die in any puzzle your soulstone and spirit are transported back to the main platform, where your teammates can raise you.
Each round is semi-randomized, so the same door won’t necessarily get you to the same puzzle in different rounds. (But they always stay the same within a single round.) The four possible configurations are:
Tiles/Roids/Ice
Ice/Tiles/Roids
Ice/Roids/Tiles
Roids/Ice/Tiles
Based on the four possible configurations, each door has a 50% chance to be its “natural” puzzle. If it’s not the natural puzzle, you know immediately where all doors go.
Natural doors are Ice/Roids/Tiles.
For example, if you enter the right door, and it’s not Tiles (the natural right door), you know exactly where all doors lead based on the four possible configurations. In the list above, there is only one combination where right is Ice, and only one where right is Roids.Last edited by EllisDee37; 04-14-2018 at 09:03 PM.
-
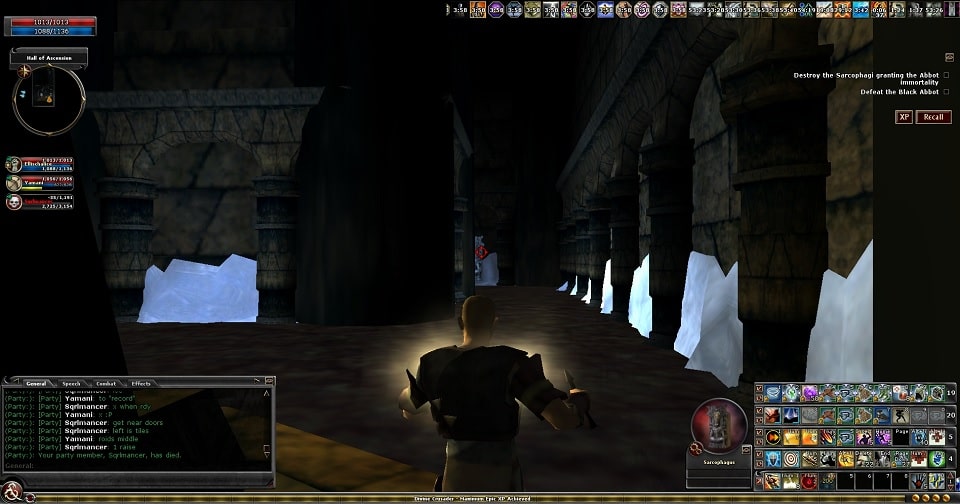
12-21-2016, 10:10 PM #3 Tiles Puzzle
The Tiles puzzle is intended to be a complex exercise in teamwork, but this shortman guide is designed for one person to solo it quickly and easily.
The puzzle room is separated into two sides (North and South), and for each side you must cross by moving across floating tiles you can’t see without special goggles.
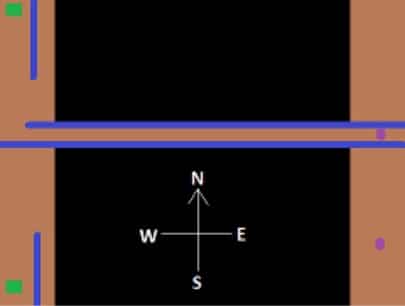
Each time you enter the Tiles puzzle you’re sent to the opposite side. The first pair of goggles is on the South side, so if you first enter in the North you need to immediately jump off the edge to suicide, then get raised back on the main platform and run back in.
Once you get the goggles from the South side, immediately jump off the edge to suicide, then get raised and run back in. You’re now on the North side with the proper goggles. Equip the goggles and make your way across the tiles. Blue tiles are permanent; they never disappear. When a tile is about to disappear (4 seconds?) it turns red.

After getting across the floating tiles, break the sarcophagus. Then run down the narrow hall to pick up the second goggles, run back up the hall and jump off the edge to suicide. There is no other way to exit the North side; you have to die. Be sure you have the second goggles before you suicide! Also, take off the special goggles before you jump off so you can see what’s happening on the platform after you die.
Completing the first side and getting the second goggles will take longer than the doors are open, so you’ll have to wait until the next round to complete the second side.
NOTE: When you first enter Tiles to work on completing the first side, you will need 1 or 2 raises depending on if you find the goggles immediately. No goggles means you’ll need two raises. Tell party chat how many raises you’ll need.
The next round, after entering Tiles you may need to suicide to switch to the South side. Once on the South side, make your way across using the second goggles and break the sarcophagus. A portal will now appear, which lets you return to the platform without having to suicide. Tiles is now complete.
Here is a video snippet of first Tiles round, which means getting both goggles and completing the North side:
Last edited by EllisDee37; 04-14-2018 at 09:03 PM.
-
12-21-2016, 10:11 PM #4 Ice Puzzle
Ice is by far the easiest of the three puzzles, but you’ll need to complete it as quickly as possible to raise the Tiles guy.
When you first port in, move to the far right side of the platform and use a range weapon to break the first sarcophagus down the hall.
Now make yourself swim fast (swim item swap, merfolk’s blessing scrolls) with lots of temp hit points (rejuvenation cocoon) and swim across to the far platform. The water does several hundred points of evil damage every few seconds. You may want silver flame potions for healing during the swim, because they won’t slow down your swimming and you take extra damage if you jump out of and land back in the water.
Once on the far platform, turn around and range the second sarcophagus. Ice is now complete, and you can use the portal to return to the platform. Do this quickly; Tiles guy is getting impatient! (Figure 60 seconds from Abbot running away until you exit Ice.)
You’ll see in party chat whether you need to raise Tiles guy once or twice. After Tiles guy is all set, you may need to enter Roids to help out. That means you have 90 seconds to complete ice, raise Tiles guy possibly twice, then enter the Roids door. Speed is the #1 concern for Ice.
Here is a video snippet of Ice, which ends with raising Tiles guy and then joining Roids:
Last edited by EllisDee37; 04-14-2018 at 09:04 PM.
-
12-21-2016, 10:11 PM #5 Roids Puzzle
This puzzle room is a small platform that starts with 4 stacks of 50 boulders spread about on the ground which must be equipped (as your weapon) and thrown at asteroids to destroy them. The asteroids fly at the platform from 360° around you and between 0° and 75° above the platform.
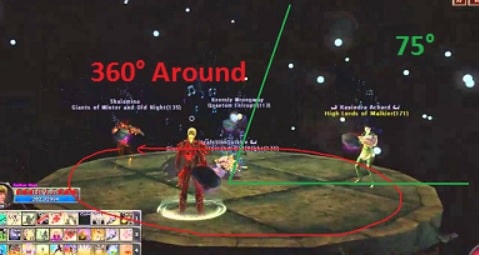
The goal is to destroy around 90 asteroids with boulders. Using regular ranged weapons doesn’t add to the total, but does actually destroy them in case you run out of boulders but your partner still has more. If you never miss, it takes around 3:15 to complete the puzzle.
Note: If you fail to complete for whatever reason, the asteroid count is reset next round.
The most reliable strategy is to have two or three people together, standing at the outside / opposite edges to each other facing inward toward each other. Spin around enough that your areas of coverage slightly overlap.
You cannot cast spells or self-heal in any way while in the Roids puzzle, and any asteroid that hits you will do around 200 base damage, reduced by PRR. They also have a knockback effect, and if you get knocked off the platform that’s an instant death.
Once the 90-some-odd asteroids have been destroyed by boulders, two sarcophagi appear. Destroy both to complete the puzzle, then take the portal back to the main platform.
Here is a video snippet of Roids from a 2-man run:
Last edited by EllisDee37; 04-14-2018 at 09:04 PM.
-
12-21-2016, 10:12 PM #6 Strategies
The general strategies include similar elements. First is that you don’t get to pick jobs before the raid, only doors. Whatever you get with your door is now your job, so everyone needs to be able to complete all puzzles.
The first time the doors open, whoever gets Tiles needs to inform party chat how many raises they’ll need to get started on the first side: 1 raise if they ported in on the goggles side, 2 raises if there are no goggles.
The Ice guy will want to swim quickly to get back in time to raise Tiles, and also possibly enter Roids to help out.
Some tools to consider, none of which are required:
- Pale Lavender Ioun Stone for inferno, or...
- ...Fire Shield scrolls for Inferno
- Jack Jibbers blade
- Swim item swap (Cannith Crafted?)
- Silver Flame Potions for Ice
- Divine Crusader being active for Heavenly Presence (immunity to Encasement)
Last edited by EllisDee37; 04-14-2018 at 09:04 PM.
-
12-21-2016, 10:12 PM #7 2-Man Strategy
The concept for 2-manning is to complete Roids in round 1. That way, any scout who ends up in Roids in subsequent rounds can immediately portal back. Round 2 will complete Ice and the first side of Tiles. Round 3 completes the second side of Tiles.
Round 1
One guy scouts the MIDDLE door, hoping for Roids. Second guy stays out to raise in case middle door is Tiles. In case the scout winds up in Tiles, grab goggles if there and suicide out. If goggles weren’t there, don’t go back in to get them. That just lowers hp when you suicide out again, and we want max hp for Roids.
If that MIDDLE door is:
ROIDS: Second guy hurries into MIDDLE door to help with Roids
TILES: After suicide / raise, both enter RIGHT door together to complete Roids
ICE: Complete Ice, then both enter LEFT door together to complete Roids
Round 2
Round 2 will complete Ice and the first side of Tiles. If someone already has goggles, they are Tiles guy and should stay outside while other guy scouts. If nobody has goggles, the scout will likely become the Tiles guy.
Goggles guy stays out while other scouts RIGHT door hoping for Tiles. If that RIGHT door is:
TILES: Tiles is RIGHT door
ICE: Tiles is LEFT door
ROIDS: Tiles is MIDDLE door
Now that we’ve identified Tiles, get someone on the North side with the first pair of goggles. As a general rule, it’s better for someone holding goggles to stay outside until the other guy gets Tiles set. (ie: Port in on South side and suicide out, letting goggles guy go directly into North side.)
Once the first (North) Tiles side is started, the other guy completes Ice. You may not know which door is Ice, but it doesn’t matter; going to Roids lets you immediately port back to the main platform and try the other door. Maybe even pick up some extra boulders while you’re there.
Round 3
Scouting works the same as round 2: Goggles guy stays outside while other guy scouts RIGHT door hoping for Tiles. See round 2 notes for Tiles locations if it isn’t RIGHT door. Once identified, non-goggles guy should “prep” Tiles by entering/suiciding until the next entrance goes to South side. Goggles guy then enters and completes Tiles.Last edited by EllisDee37; 12-21-2016 at 11:06 PM.
-
12-21-2016, 10:13 PM #8 3-Man Strategy
The concept for 3-manning is to complete Roids, Ice, and the first side of Tiles in round 1. Round 2 finishes Tiles and you’re done. One unlucky scout will end up having to solo Roids for around a minute, until Ice guy can join.
Round 1
All three enter different doors immediately:
TILES
Grab goggles if there and jump off edge to suicide. Tell party chat how many raises you need. (1 raise if you found goggles, 2 raises if you still need to get goggles.)
ICE
Quickly complete Ice and hurry back so you can raise Tiles guy once or twice to get him started on the first Tiles side. Once he’s all set, enter Roids to help the poor schmuck currently soloing it. Pick up the final two piles of rocks, equip them, go to the opposite edge of the Roids guy and turn to face him and start chucking.
ROIDS
Quickly tell party chat which door goes to Roids. Pick up two piles of rocks (50 shots each), equip them as your weapon and start chucking them at asteroids. You’ll need to hold on for about 60-90 seconds before help arrives, at which point you two fan out to opposite sides and face each other.
Round 2
Goggles guy stays outside while other two scout the same doors they scouted in round 1. (Easier to remember that way.) Both scouts report where they are, which now tells us where Tiles is.
Now all three work to get goggles guy into the South side of Tiles so he can complete the second side. As a general rule, it’s preferred to keep the goggles guy outside until entering goes directly to the South side. But it doesn’t really matter; you should have plenty of time to get goggles guy into the South side of Tiles before the doors close.
For scouts:
TILES: Suicide out immediately, goggles guy raises you.
ICE: Make the swim, portal back.
ROIDS: Pick up extra boulders, portal back.
Here is complete video of a 3-Man run using this strategy, where I happened to get Ice in Round 1:
Last edited by EllisDee37; 12-21-2016 at 11:09 PM.
-
12-21-2016, 10:13 PM #9 4+ Strategy
Same as 3-man, except you have an extra body to work with. This guy stays outside while the other three scout. He waits to raise Tiles scout once then immediately enter Roids to help out. If Tiles guy needs a second raise, Ice guy can raise him.
You might prefer bringing three people into Roids. In that case, initial scout picks up two piles of rocks, next two guys pick up one pile each. (There are four piles to start with.) Ice guy should join as soon as he can; he may have to raise Tiles guy before entering.
In essence, the fourth man greatly eases the pressure on the Roids scout. You still need 2 rounds to complete, because no matter what, soloing Tiles will take 2 rounds. (It is possible to solo Tiles in one round, but that requires advanced tactics, specific build requirements, and some luck.) But instead of the Roids scout soloing for a full minute, it’s more like 10-15 seconds.Last edited by EllisDee37; 12-21-2016 at 10:58 PM.
-
12-21-2016, 10:57 PM #10
All set.
Comments and corrections welcome.Last edited by EllisDee37; 12-21-2016 at 11:23 PM.
-
12-22-2016, 05:49 AM #11The Hatchery

2016 DDO Players Council


- Join Date
- Aug 2011
- Posts
- 0
AFAIK, a lot of ppl during roids solo shooting prefer to switch to full first-person-view (1 on number pad of keyboard or roll your mouse-wheel) and stay in center, rotating around own axis for 270° there and back (like a radar, lol) Originally Posted by EllisDee37
 "I shall take your position into consideration. Well, it seems your terms are not acceptable." (c) Baal
Argonnessen :: Marche Funebre (200) : Leningradets / Zapasnoy / Grimstave / Rockernaut / Dociznogoud / Feldshaman
-
12-22-2016, 07:18 AM #12Community Member

- Join Date
- Apr 2011
- Posts
- 1,557
For Inferno, use a PLIS.
It uses up three charges, and stops the damage and spell point drain.
Switch back to another trinket afterwards, to conserve charges.
Have a Jeweled cloak or a Scarab of Spell Absorption as backup.
-
12-22-2016, 07:34 AM #13Community Member
- Join Date
- Apr 2013
- Posts
- 1,622
If I ever had another player that knew ascension chamber like I do, then this would be our 2 player tactics:
ROUND 1:
Player 1 goes in right portal. If this portal is:
TILES (right side): Player 1 dies and re-enters right portal.
TILES (left side): Player 1 grabs goggles and tries to do it blind. Then he dies. Then each player goes to middle and left portal to solo ice and roids respectively.
ICE: Player 2 enters middle portal (which is roids) and solos it. Player 1 solos ice (with wands, not swimming).
ROIDS: Player 2 enters left portal (which is ice) and solos it (with wands, not swimming). Player 1 solos roids.
ROUND 2:
Ice and roids have been completed.
Player 1 goes in right portal. If the portal is:
ICE: Player 1 dies and then enters left portal
ROIDS: Player 1 exits and then enters middle portal
TILES (right side): Player 1 grabs goggles if he didn't have them from previous round and then he tries to do it blind. Then he dies. Then he enters the same portal again.
TILES (left side): If Player 1 has goggles from previous round, he completes right side while Player 2 enters the same portal to be guided. If Player 1 does not have goggles, he dies and re-enters the portal, takes the goggles from left side, tries to do it blind, dies. Then he re-enters it and does right side while Player 2 enters the same portal to be guided.
If Player 2 fails to be guided, then they do a 3rd round with both goggles. Otherwise, raid is complete in 2 rounds.
3 people can complete it in 1 round with goggle guidance. (1 of them does ice fast and then roids, while the other 2 do goggles)My main server is Khyber. Have toons in almost every server for favor purposes. The Faltouts
-
12-22-2016, 11:49 AM #14
Nice tip. I was actually wondering about that last week, but then forgot. Originally Posted by noble_pirate
Great tip. I'm constantly remembering to do that just after the raid is over, then look at my unused PLIS with chagrin. Originally Posted by GeoffWatson
-
12-22-2016, 11:50 AM #15
We're actually starting to think that Roids might not be all that difficult to solo. Sqrl is confident he can do it (and he has), while I'm still a touch skeptical. But it's certainly worth a shot. Originally Posted by Faltout
With solo Roids as an option, two rounds for 2-man seems like a safe bet.
-
12-24-2016, 05:53 AM #16Community Member
- Join Date
- Apr 2013
- Posts
- 1,622
To do roids solo on elite, you need what noble_pirate said. Grab 2 stacks of rocks (because on elite, one stack always runs out) and stand at center. Switch to first person view, set mouselook on and start rotating with a semi-constant speed. If you see a roid appearing far away that would require you to face the same direction longer than usual, you should just ignore it and get it on the next rotation. That's the most common rookie mistake. A person tries to shoot roids as soon as they appear turning randomly around. This means that you might not cover all sides and take one roid on the back. And once you do, you get disoriented and take several more hits eventually failing the puzzle. Originally Posted by EllisDee37
My level 18 bard with 300 hitpoints has consistently completed roids solo on elite (as well as ice solo on elite in a fairly fast way with wands). Another silly mistake would be to not have enough inventory slots... hehe.My main server is Khyber. Have toons in almost every server for favor purposes. The Faltouts
-
12-24-2016, 06:00 AM #17Community Member
- Join Date
- Apr 2011
- Posts
- 1,557
I've soloed Roids many times, easily doable. Originally Posted by EllisDee37
-
12-26-2016, 10:34 PM #18Community Member

- Join Date
- Sep 2009
- Posts
- 587
Couple of things from the runs ellis and I have done.
1) Roids - Definitely reliably solo'able as many others have said. The biggest issue is lag causing you to fire late and miss your target. These issues compound quickly if more than 1 or 2 happen in quick succession.
2) Inferno - As a PM I have taken to just jumping off the platform when it starts and jumping back on after a long 3 count. I can swim in the water with my aura almost indefinitely though, so your mileage may vary depending on Neg Hamp & Neg Spellpower. PLIS is definitely the easy and universal solution though.
3) Getting roids done first round makes future rounds substantially easier.
-
09-30-2017, 01:14 AM #19Community Member
- Join Date
- Sep 2009
- Posts
- 587
Apologies for the necro here but I just ran this tonight with a group of folks who had happened to read this guide and said they were inspired to give the raid a try as a result (they did quite well!).
While that is definitely cool, the reason I am posting is because I realized one of the things Ellis and I learned either from someone else or on our own (hard to remember now), was seemingly left out of the guide.
Specifically, you can tell how long the abbot has left before he comes down from his statue by doing the following:
1) Target Abbot on his statue.
2) Inspect the Abbot's Buffs ('Z' is default hotkey)
3) He has a buff (iirc it is "Mantle of Invulnerability") that starts with 60 min on it and refreshes each time he jumps onto the statue.
4) When there is 54:25 (give or take a few seconds) he will come down and start the next round of fighting.
Very useful to be able to tell if you have time to use the restroom or place an amazon order =P
PS - Devs you could really probably shorten the time he is up on his statue by 2 full minutes without modifying difficulty basically at all. Many groups just wait at the end of their rooms until all 3 groups are ready to port back anyways. Would just save people from waiting around for no real reason (trash is beyond trivial even at-level for anyone who has a real shot to beat it - this is largely thanks to the roughly quadrupling of his hitpoints over the course of several "adjustments" to the raid which made it so if you can't handle the trash indefinitely you basically have no business in there). Obviously this is not the biggest issue by any stretch of the imagination...just if you happen to be in that code maybe? /shrugLast edited by Sqrlmonger; 09-30-2017 at 01:17 AM.
-
12-12-2017, 09:01 PM #20Community Member

- Join Date
- Jul 2010
- Posts
- 174
Fantastic Guide
I personally had issues with even trying to attempt this raid with my busy single dad life. After having viewed this Guide I can tell you honestly, thank you so much. This guide alone gave me the know how to at least want to attempt it as i was pretty stoked after watching all the vids and links. I was also impressed by the in depth explanations of the raid. Personally for me, I am a hands on guy. I want to do it, to know it. At the same time, I found this guide to be very informative for learning before attempting. Hands down, one of the best Raid Guides I have seen. Again, thank you Ellis. You never cease to amaze me with planning.
Proud leader of The Forgotten Creed of Argo. long live PNP & Gary Gygax immortalized.
Main: Alumut of Argonnessen

 Reply With Quote